

Last March, due to a pretty complicated situation, I (and others) bought a house. Although the budget for renovations wasn’t that large (and we blew out of it anyway…) I wanted to make sure that I’d have works done not only to have a comfortable place to live, but also properly done from a digital / IT perspective.
In short, this is how my adventure into the dangerous field of “homelabbing” began. This article is about the hardware: for the software I’ll make a separate one.
The past problems and the present solution #

The places I lived in before were always on lease. Which means that the amount of the work I could do was very limited. Also most of the apartments were fairly old, and when I was able to have Ethernet put into the walls, the workers completely messed up the positioning… Due to that even when adding access points, many compromises were made (including a 15m long Ethernet cable running close to the floor…)
Naturally, when the house works were contracted, I made sure to put into the quote also space for Ethernet, given that I wanted to avoid past mistakes, and as some walls were to be torn down, I only had one chance of getting it right.
The plan #
The plan was simple. I needed enough Ethernet ports for:
- My own machine
- Two different access points for Wi-Fi connectivity to be powered via PoE to avoid extra cabling
- Another desktop for another person living in the house (Windows)
- A media center (mainly used for Kodi and some extra services)
- One smart TV (a second one via Powerline adapters)
- My laptop and docking station
- Consoles (PS4 and PS5)
Seems a lot? Nope. I also needed a place where all the cabling converged so I could put the largest equipment there, namely:
seldon: router, Turris Omnia (Indiegogo version)palver: self-built NAS inside an In-Win MS-40 casepikvm: PiKVM version 3, bought from the Kickstarter campaignkiritan: Raspberry Pi 4 2G, running Pi-Holeap1: Zyxel WiFi6 AX1800ap2: MikroTik cAP ac- UPS: Eaton Eco 650 VA (3 battery backed sockets, 1 filtered socket)
- ORICO 3.5 inch External Enclosure: Attached to palver, used for backing up the Windows machine
And on top of that, the crappy appliance provided by my ISP (“Fastgate Seven”).
As you can see, that’s already a lot of stuff!
Running the cables were they belonged #

Correct, Michiru. There’s no way I could have ports for all of these. Not on the budget I had, anyway.
Therefore, some rationalization was required. The easiest part was my work area, since a wall was torn down and replaced with drywall in a different position. Having cables run there was pretty easy, as shown from this photo (yeah, I was taking measurements).
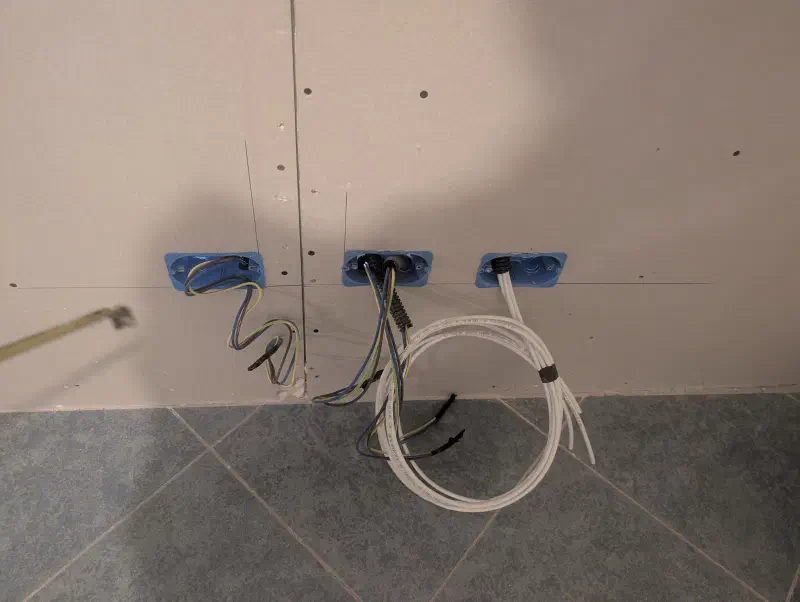
The converging point was behind a door and another wall, so since I needed other things, a false ceiling in drywall was made, conveniently making room for the cables. Two other outlets (one for AP, one for desktop) were in another room, and since a door was closed off with drywall, adjustments were made to run the cables in those walls, too, using existing runs.
In the end six ports were made:
- 3 in my “office/living room” area
- 2 for the other room (1 for Ethernet, 1 for AP)
- 1 for the other AP
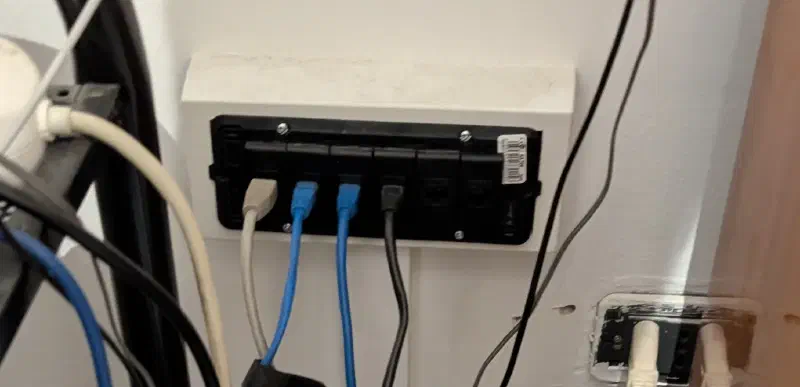
These all converged in a relatively tiny part of the apartment, next to a radiator (I know! But there wasn’t enough room anywhere else) where six Ethernet ports were made.
QC and tests #
First of all I had to check which ports of the six corresponded to which wires, so I bought a cheap network tester on Amazon and started doing measurements…

One socket was not working, of course (?) and the AP cables were dead. A call with the construction company and one visit later, they were all fixed. One wall socket had to be readjusted, and the AP wires crimped again.
Afterwards, all cable tests succeeded.
There I fixed it! Maybe.. #
Due to a number of reasons, I had to set up a temporary solution before I could actually arrange things properly, also because people in the house needed to work from home and thus a working network was essential. Due to the cats, placing stuff on the floor was not an option, so I grabbed a serving trolley that was around and created my “ghetto rack”:
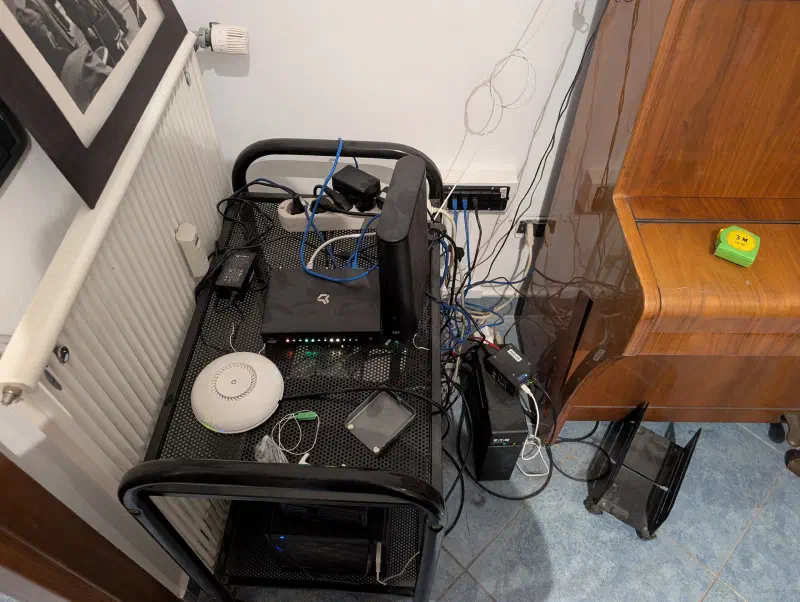
Yeah, a mess. I could only connect one AP, and the wires were all over the place. Luckily, I expected this situation to last a couple months at best… and unlike the usual axioms in IT, this time the situation did not become permanent!
Setting up a rack #
I’ve been wanting to consolidate my gear in a rack since ages ago. I even drew diagrams to see how it would work. Unfortunately, no place where I was staying could fulfill the necessary space requirements. Of course, with a house of my own, things were different.
As soon as it was affordable, I set out to collect what was needed. In the end, I even needed a LLM, not for tips or how to build, but to search the listings, because it was impossible to find relevant resources with a web search.
After a few weeks of investigation, I was ready to start.
Bill of materials #
The stuff I didn’t have yet was more than I had expected, and I had to purchase quite a bit.
- Rack: Tecmojo 12U 450mm Depth Black Glass Door Standard Wall Mount Cabinet
- Shelves:
- Core switch: TP-Link TL-SG1016PE Easy Smart 16-port switch
- Cable management: Digitus 1U cable management with brush
- Colored network cables of different length:
- Blue (6x) - for the wall patch panel
- Black (2x) - internal connections
- White (1x) - NAS connection
- Red (1x) - Upstream connection to the Fastgate
- Purple (1x) - Uplink to Turris Omnia
- Green (1x) - Powerline adapter
- Cage nuts
- Cage insertion / removal tool - Because I remembered how hard it was to do it without
- 3M Dual Lock tape
- Velcro cable ties
- 8-socket PDU with Italian plug
Assembly #
It took three weeks or so to get all the stuff sorted out. Then I finally started to assemble the rack.
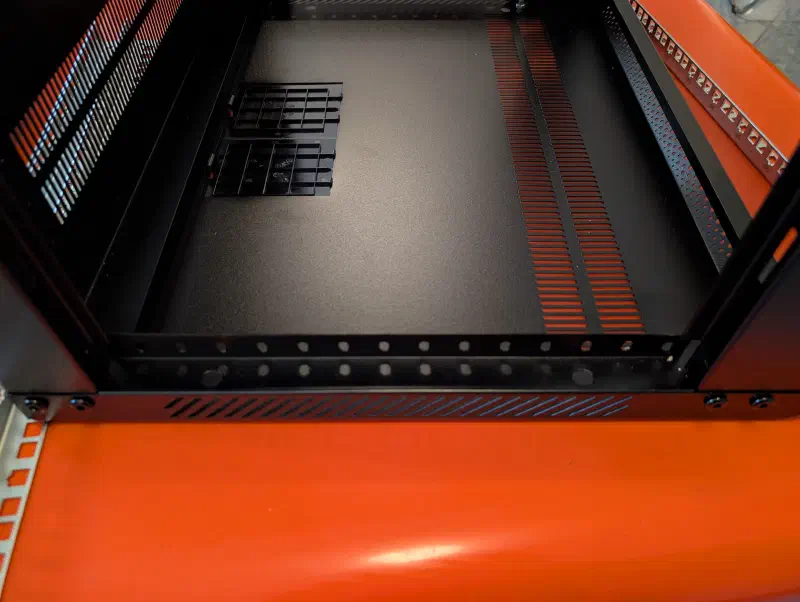
To be brutally honest: I chose the TechMojo rack because of depth (450mm instead of 600mm) and more importantly out of price. I deeply regretted that while assembling it. The assembly was flimsy, the metal was often bent, and I had to use pliers to put it back in place or, in one case, use the handle of a screwdriver under a corner to make two screw holes actually line up. A lot more physical labor than what I had expected.
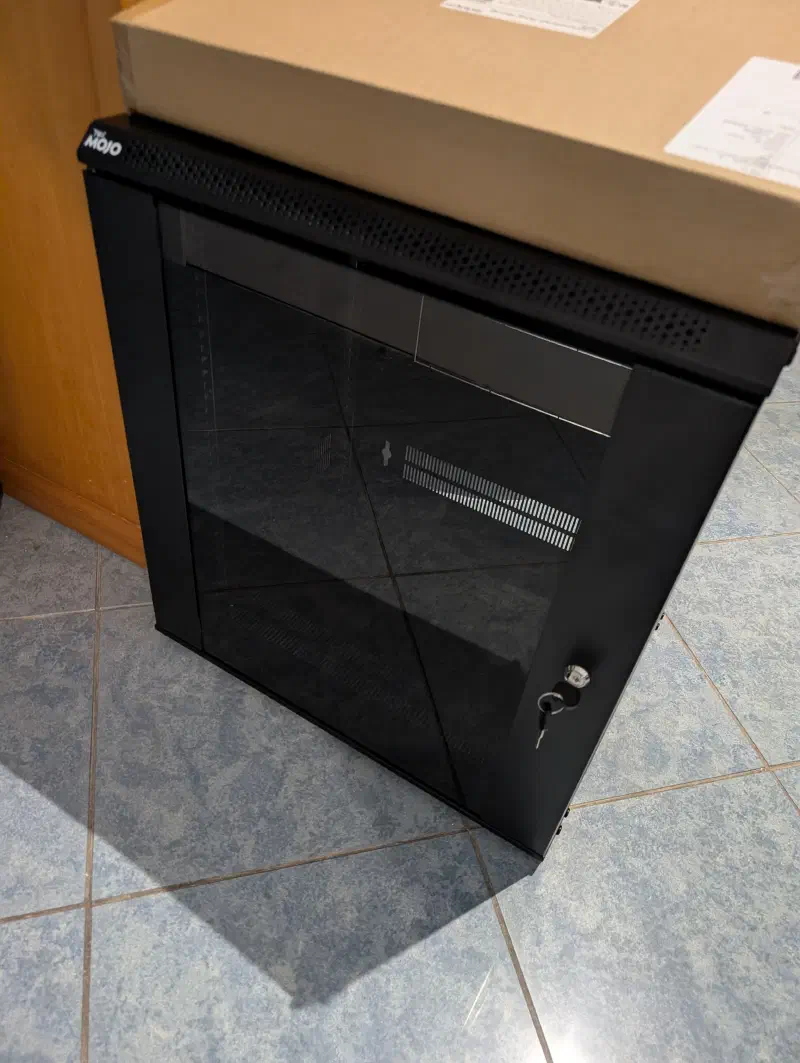
Neverheless, after a couple hours (and two more helping hands) it was fully assembled and ready to roll. Then it was time to put the gear inside.
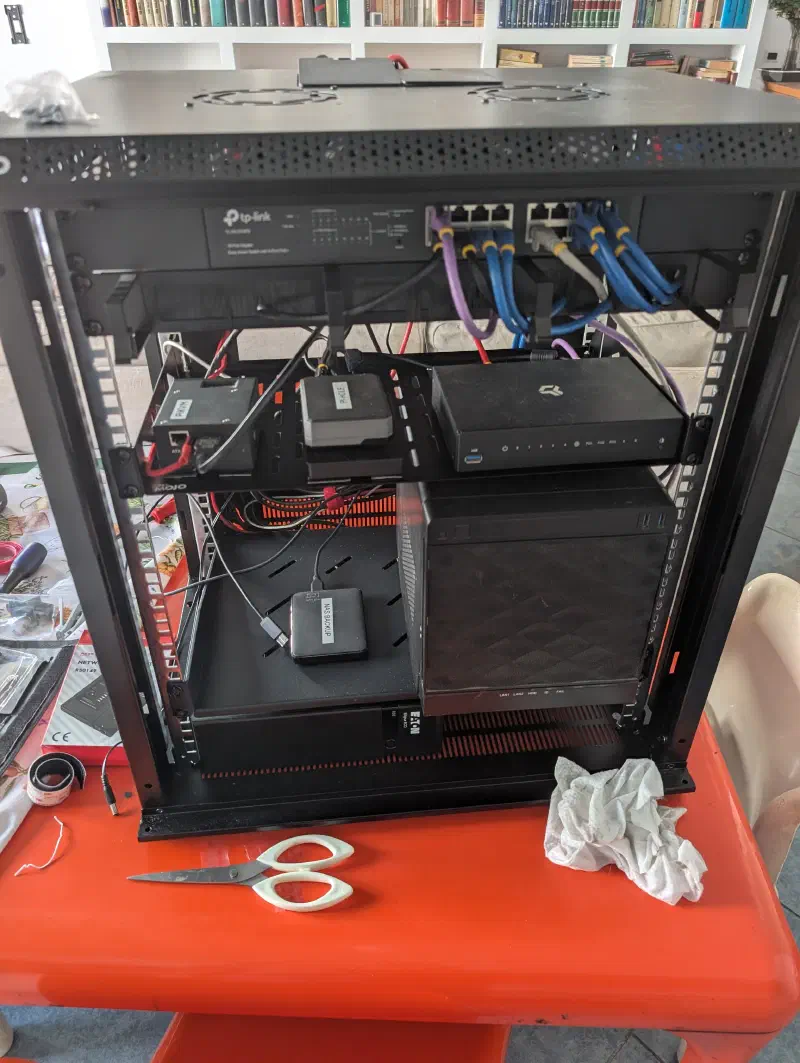
There were a few unexpected snags when adding the devices and the shelves. The mounting rack kit for the Eaton was 400mm deep, which meant it would not fit inside my rack (I had to return it). I decided to put the UPS on the rack floor, fixed with 4 strips of Dual Lock table. It held surprisingly well.
Then it was time for the PDU and how to arrange cabling, since the UPS had only three battery backed sockets. In the end, I went with this arrangement:
- UPS: cable goes into the mains;
- PDU: cable goes in the filtered (non battery) socket of the Eaton UPS;
- NAS: attached to the UPS;
- Switch: attached to the UPS;
- Omnia: attached to the UPS.
Like this at least all the appliances would go through a filtered power socket.
I put the StarTech shelf over the Eaton and put the NAS on it (the empty space you see on the left is for the ORICO enclosure). Then another shelf where I secured the PiKVM (again Dual Lock tape), the other Pi, and the Omnia. The Omnia power brick had substantial cable length, so I put it on the floor of the rack (there was enough space anyway, and secured it).
Then it was the turn of the switch.
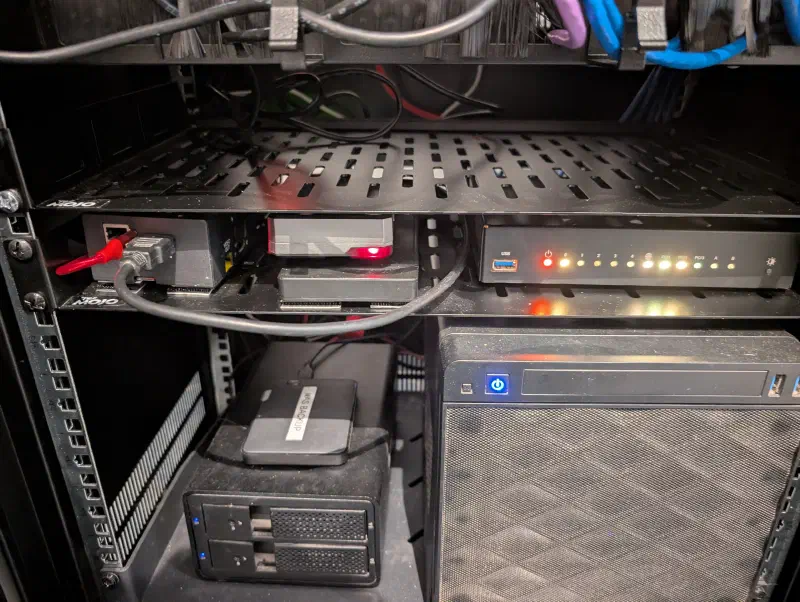
This is how it looked in the end more or less, with an additional shelf on top. I punched the hole in the rear for cables to come out so they would reach the Ethernet sockets and the only usable power socket there. Everything was done with the rack elsewhere, then I dragged it to its location and conected everything.
When power was applied, everything came up with little issues! A good (and unexpected?) result!
WiFi AP placement #
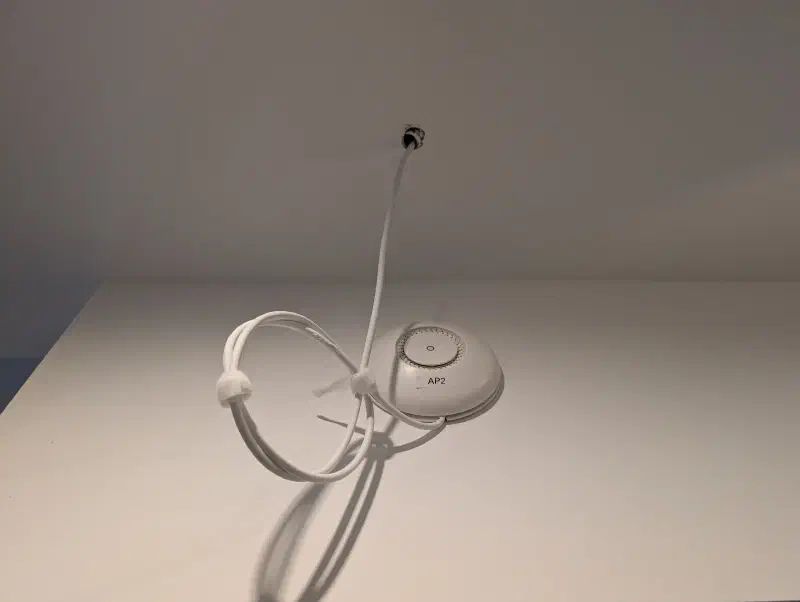
With the help of some people I secured the APs to the wall and connected them to the cables, which had been previously wired to the PoE ports of the switch.
This photo shows the Mikrotik AP after installation. The Zyxel had a similar setup.
A new addition #
A few weeks later, I found myself in some predicament because the DNS would not work (more on this when I’ll write the next part about software). And there were no means to monitor the entire rack. I previously had done something with the Pi now serving DNS, but it was too complicated, and it was indeed the part that had failed…
So, I set up for a new monitoring machine. I originally thought of a low-memory Pi or other SBCs (single-board computers), but the crazy memory prices made me reconsider entirely: A 2GB Pi 5 went for €120!!!
Like I did for my previous laptop, I turned to the second-hand and refurbished market.
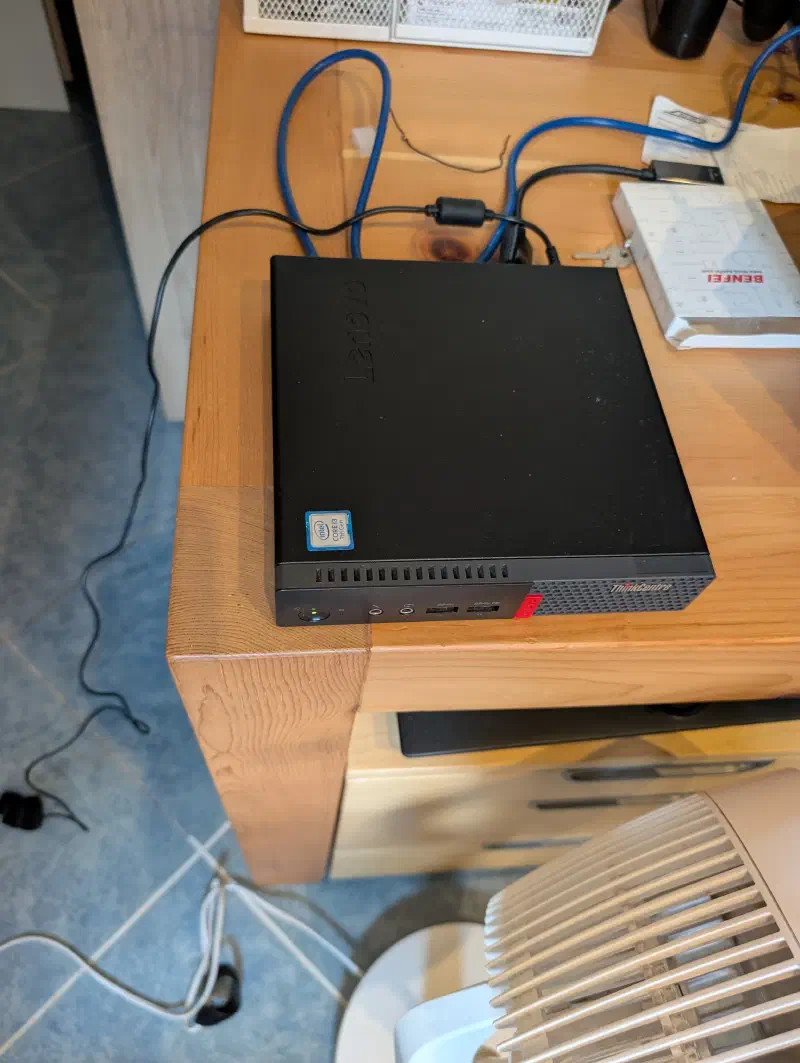
In the end I was able to snatch a Lenovo ThinkCentre M910q Tiny with 16G RAM and a 256G NVMe SSD at €121. The same as the Pi 5, but much more powerful. And this would become the new monitoring machine (and something more).
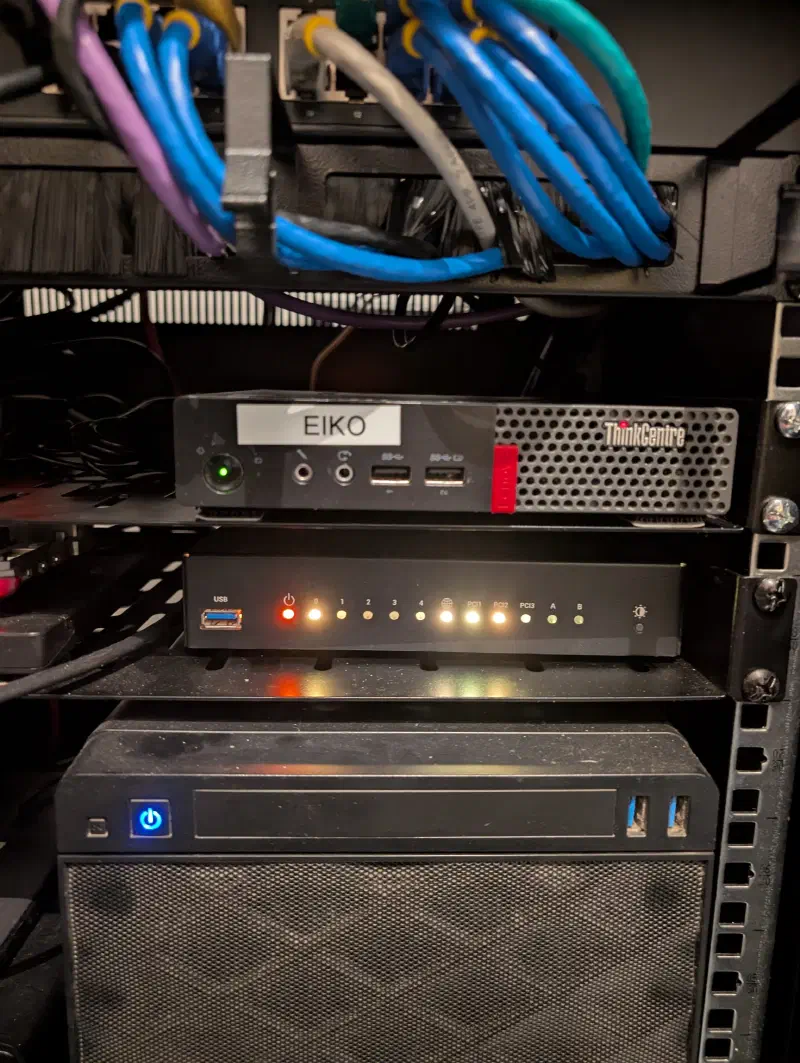
Nicknamed eiko, I put it on the extra TechMojo shelf I had, and it was ready to roll!
Conclusions #

So… what exactly was I going to do with all this stuff? Originally I thought I’d write an entire article about everything, but this one is already extremely long… therefore, this will be the subject of the next part.
Until then… see you next time!